Python
General-purpose, high-level programming language supporting multiple programming paradigms.
General-purpose, high-level programming language supporting multiple programming paradigms.
MicroPython is a special light implementation of Python 3 that includes a small subset of the Python standard library and is optimized to run on microcontrollers.
You can use MicroPython on various boards such as:
Each device mentioned above has its own way of controlling and uploading content. Some of them will be described in the following chapters.
If you want to try MicroPython and learn about the differences between MicroPython and Python, install MicroPython with a command
$ sudo dnf install micropython
and then start an interactive MicroPython session.
$ micropython
MicroPython v1.12 on 2020-04-15; linux version
Use Ctrl-D to exit, Ctrl-E for paste mode
>>>
Using MicroPython on your computer makes sense only for some basic testing purposes. Its main goal is to control embedded devices.
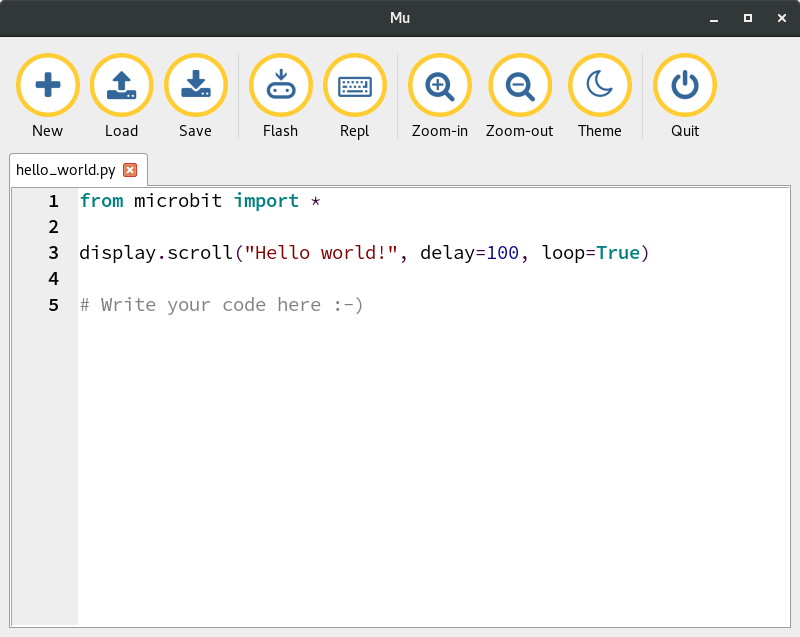
Micro:bit tries to be as simple to use as possible, so its developers decided to make their own IDE named Mu. Mu is designed for beginners to learn the basics of programming. When coding in Mu, you only need one click to flash (upload) your app to your micro:bit or to start the REPL, an interactive Python session. Your device is mounted automatically in Fedora.
Mu is a part of Fedora, so you can install it with:
$ sudo dnf install mu
and then you can run your new IDE from a terminal or from the apps menu.
$ mu
Mu looks like this:
If you prefer to use your own text editor instead of Mu, uFlash is the right utility for you. uFlash is a command line tool (written in Python) for flashing your Python scripts to Micro:bit.
To install it, type
$ sudo dnf install uflash
The next step is to flash your script to Micro:bit. Just use the path to the script as
the first parameter for uflash.
$ uflash ./hello_world.py
If you want to control your ESP8266/ESP32 device using MicroPython, write MicroPython firmware into the flash memory of your device.
You can download MicroPython firmware from the download section of its web page. Choose the latest one suitable for your device. The download page includes detailed (but not Fedora-specific) information. If you run into problems, use the tutorials it links to.
esptool is a handy CLI application that helps you flash your device. To install it, type
$ sudo dnf install esptool
Check the esptool version to differentiate between commands below.
Version 5+ (available from Fedora 44) has changed the command names - they
contain - instead of the previous _ in their names.
$ esptool version
esptool.py v4.8.1
4.8.1
With the firmware downloaded and esptool installed, you need to know the last
thing to connect and flash your device - the device’s name. You can find it in
the result of the dmesg command. Use dmesg with tail to obtain the last
ten lines of the dmesg output.
$ dmesg | tail
[703169.886296] ch341 1-1.1:1.0: device disconnected
[703176.972781] usb 1-1.1: new full-speed USB device number 45 using ehci-pci
[703177.059448] usb 1-1.1: New USB device found, idVendor=1a86, idProduct=7523
[703177.059454] usb 1-1.1: New USB device strings: Mfr=0, Product=2, SerialNumber=0
[703177.059457] usb 1-1.1: Product: USB2.0-Serial
[703177.060474] ch341 1-1.1:1.0: ch341-uart converter detected
[703177.062781] usb 1-1.1: ch341-uart converter now attached to **ttyUSB0**
The name of your device starts with tty.
You also need the rights to access your device.
You can use sudo before any esptool and picocom commands
mentioned below, but the preferred and more secure way is to add your regular
user account to a special system group dialout. To do it, type
$ sudo usermod -a -G dialout <username>
It is necessary to logout and login for this change to take effect.
Alternatively, re-login with the command su - $(whoami), but note that this will only affect the your current console session.
Use esptool to flash your device. It is suggested to erase the flash
memory before writing new firmware. To do it, type the following and do not forget to replace ttyUSB0 with the name of your device.
For esptool < 5.0.0, type
$ esptool --port /dev/ttyUSB0 erase_flash
esptool.py v1.1
Connecting...
Erasing flash (this may take a while)...
For esptool >= 5.0.0, the command is as follows
$ esptool --port /dev/ttyUSB0 erase-flash
And now you can write MicroPython firmware to empty the flash memory. Again, do not forget to replace ttyUSB0 with the name of your device.
For an ESP8266 and esptool < 5.0.0:
$ esptool --port /dev/ttyUSB0 --baud 115200 write_flash --flash_size=detect 0 esp8266-20200911-v1.13.bin
esptool.py v1.1
Connecting...
Running Cesanta flasher stub...
Flash params set to 0x0020
Writing 565248 @ 0x0... 565248 (100 %)
Wrote 565248 bytes at 0x0 in 49.0 seconds (92.3 kbit/s)...
Leaving...
For an ESP8266 and esptool >= 5.0.0:
$ esptool --port /dev/ttyUSB0 --baud 115200 write-flash --flash-size=detect 0 esp8266-20200911-v1.13.bin
For an ESP32 and esptool < 5.0.0, the command is slightly different:
$ esptool --chip esp32 --port /dev/ttyUSB0 --baud 460800 write_flash -z 0x1000 esp32-idf3-20200902-v1.13.bin
For an ESP32 and esptool >= 5.0.0:
$ esptool --chip esp32 --port /dev/ttyUSB0 --baud 460800 write-flash -z 0x1000 esp32-idf3-20200902-v1.13.bin
You might need to change the name of your device and the name of the binary file with
firmware, and some devices require a different --flash_mode (--flash-mode in esptool >= 5.0.0) setting
– see esptool write_flash --help (esptool write-flash --help in esptool >= 5.0.0) for the options.
Other parameters such as a baud-rate (connection speed) should be OK in most cases.
A lot of microcontrollers (like those with the ESP8266/ESP32 chip) provide a serial
console for communication with the outer world. Fedora provides a
minimalistic and handy tool for connecting to it - picocom.
To install it, type
$ sudo dnf install picocom
To use it, type the following (and do not forget to replace ttyUSB0 with the name of your device).
$ picocom -b 115200 /dev/ttyUSB0
picocom v1.7

port is        : /dev/ttyUSB0
flowcontrol    : none
baudrate is    : 115200
parity is      : none
databits are   : 8
escape is      : C-a
local echo is  : no
noinit is      : no
noreset is     : no
nolock is      : no
send_cmd is    : sz -vv
receive_cmd is : rz -vv
imap is        :
omap is        :
emap is        : crcrlf,delbs,

Terminal ready

>>>
The -b parameter sets the baud-rate to 115200 bps, MicroPython’s default connection speed on these devices.
The last line of the output (the one with >>>) means that MicroPython on your device
is ready to be used. If you do not see the last line, press Enter on your keyboard. If you still do not see the prompt, press RESET on your device.
>>> print('Let the connecting to IoT begin!')
Let the connecting to IoT begin!
>>>
Authors: Jarek Prokop, Karolina Surma, Nick Dirschel, Petr Viktorin, jhornice